
These led strip lights are bright and fun. This makes a boring room fun and exciting. It took a little time to stick the entire roll around my room but it came out great.
Don’t mess up when installing, you have room for maybe one minor mistake. Just be careful and go slow. Think first about how to do any curves. That being said, once they’re up, they’re gorgeous! We installed led strips easily and they look great!
If you’re thinking about adding some cool lights to your room and are on a budget, get these led lights. And try these few tips on how to connect led strip lights!

How to connect led strips together
Hang these led strips up in your room, and want it almost go around the whole room! You need to cut them on seamlines and reconnect them. If you have a hard time connecting them, you can follow this guide. This article will show two ways to connect led strip lights.
How to connect led strips without connectors
Soldering led strip lights to each other is an easy process. But, it requires you are familiar with soldering. So that if you have soldering skills and have the equipment to solder. You can choose this way.
1. Check the polarity of the copper pads on the strip lights before you are soldering. The single-color strip lights only have two pins, one positive and the other negative.
2. Connect the positive of one led strip to the positive of the other and the same with the negative. And ensure you have aligned the pads on both the strip lights. Then apply a little solder to all the copper pads to connect them.
The way is the same for both single-color and RGB strip lights. However, the RGB led strips have four copper pads, and the size of the copper pads is slightly smaller and slightly more difficult to solder. So that if you want to solder one RGB strip light to the other compatible ones, you need a little more patience and be a bit more careful.
How to connect led strips with connectors
Adding some mood lighting to my home and needed some T-Shape or L-Shape led light strip connectors. Landed on these and they worked perfectly. We will need it for long runs and other runs around corners, which helped us change the current directions well. We can use it to connect led light strips with both horizontal and vertical runs.
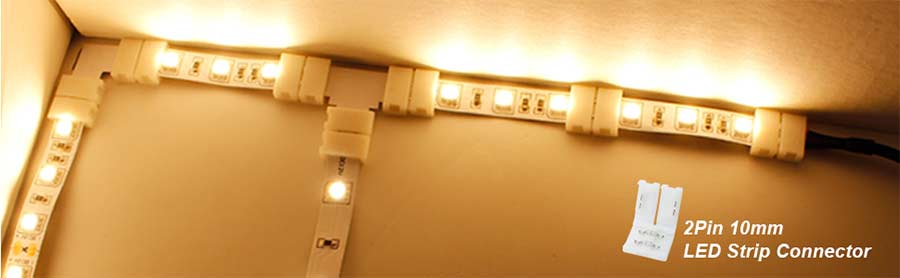
These worked great for repairing a broken link in my LED strip. Simple to use. Just make there’s no solder on your led strip contacts as the led strip needs to slide through a little plastic groove before it fits underneath the contacts in this connector.
LED light strip connectors work great to connect led lights together after cutting them. You can use them to do your entire room. No need to try to solder wires on these led strip lights. Here are some tips to help you.
1. These connectors are hard to open. You can gently pry the pins a very small amount using tweezers or a small screwdriver. Otherwise, you can’t get the light strip to fit under the connector’s pins.
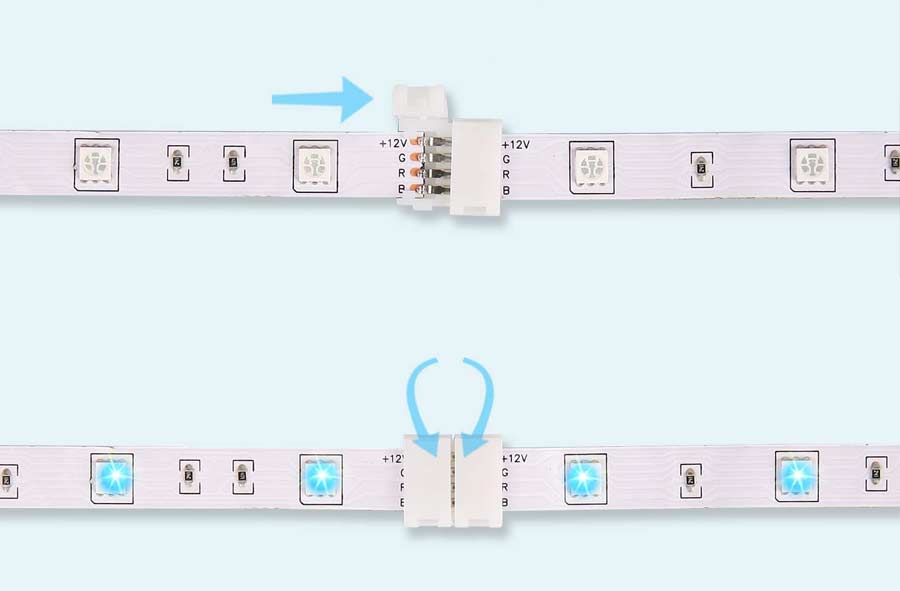
2. Gently scrape the strip light connection lead and stop when you start seeing copper. When you cut the gold strips cause you don’t want the black piece and the wires to show, you need to get a connector and put the gold strips UNDER the little metal pieces, not on top. If you put them on top, they won’t work.
3. Just don’t take the adhesive off of the led strips before putting them into the connector. Pull the adhesive off after you connect them. If you have to take the backing off the strip lights, you can add a layer of paper only big enough to fit in the connecter and it slid right it!
4. Connect all strip ends before you install led lights around your house and make sure they work.
5. Ensure that you are plugging in both led strip ends with the same color spectrum touching the same.
6. Now, enjoy your cool led strip lights.
These are a must if you goof around with the LED strip lights. You were doing the scraping thing and soldering on wires before you got these. What an air head. Once you got a hold of these, it was like night and day in convenience and efficiency.
There are single-color strip lights, RGB strip lights, and RGBW led strips. Due to the various number of pins each type of strip light has. You have to buy appropriate led strip connectors to connect led strips.
Single-color strip lights have two pins, so you need 2 pin led connectors. The RGB led strips have four pins, so ensure 4 pin led connectors you have. RGBW led strip lights have five pins, so you have to buy 5 pin led strip connectors.
How to connect led lights to power supply
Connect led lights to the power supply is easy. If you got the led strip lights with a power supply adapter, plug it into the outlet to power the strip lights. A power bank is enough. If you want to connect USB led light strips to the power supply. There are many methods to connect led lights to the power supply.
How to connect multiple led strip lights
Buy led light connectors to connect two or multiple led strip lights together. The upper limit depends on the led strip lights’ power output and the power source. You will need a separate power supply if you are trying to power a long strand of lights.
1. All four leads need to be under the four metal leads inside the connectors on both sides. If not, it won’t light up.
2. Check right after you make your connection, plug it in to check that it works properly on all colors. Make sure the sticky back is sticking to the connector. It will help but don’t rely on just that to keep it from shifting.
3. Do not put any tension on it while attaching it to the wall, or it will shift in the connector. Press the led strip on with either side of it to the wall and then press it on last instead of pulling the loose end tight as I press it to the wall as if it was an intact strip-that will loosen the connector.
4. Also, it may shift while you are trying to put it up. So after you have it on the wall, you have to check before completely installed it on the wall by lifting the flaps and making sure the leads are sitting correctly inside.
5. If certain colors aren’t working, then your leads have dislodged. Open the connector and push it back in.
6. Always cut your led strip light on the copper part where the little scissor symbol is located. Otherwise, it will not light past the last copper lead.
Conclusion
If you are new to everything and do not know how to connect led strips. I hope this will help if you follow the guide. It is that simple to connect led strips together.